Finally "finished" the new nursery up last weekend (it still needs some decorative stuff, but, for the most part it's ready to go).
We ended up doing some switch-a-roo-ing to make "everything" fit in terms of rooms of our house. Jacob's office was downsized and was moved to a section of our TV room (I was worried that it was going to be too crowded, but it actually turned out ok). Emily was moved from her nursery to a new "big girl room" that was Jacob's office, and the new baby will reside in the nursery that's been updated slightly since Emily's departure.
For those of you who have been reading my blog since Emily's arrival (and for those of you who haven't), here's a reminder of what the nursery looked like when it was her's. The main differences now is a new rug, new curtains (we actually got even NEWER curtains since the below photos were taken--they are all navy now) and some different wall decorations:
Emily's new "big girl room" is where most of my energy was spent. She already had her toddler bed, but needed a dresser, bookshelves/case, some organizational stuff, and some kind of seating... so I got to go shopping. =) We kept the curtains from her nursery, just moved them over, and reused the same rug. I found a great little dresser on a FB sales group and the bookcase from IKEA. I even got to pick out a new paint color for the walls! I wasn't sure what to do about seating, but was able to find a slipcover that worked for the chair that was in there when it was still Jacob's office. So that worked out, too! We did all of the painting and most of the furniture stuff back in August when Emily spent a week with her grandparents, and then we moved her in a couple of weeks later.
I think my kids have some pretty cute, comfy, cozy rooms if I do say so myself. ;) Now it's time to change up my own! lol
Showing posts with label DIY. Show all posts
Friday, October 24, 2014
Friday, June 8, 2012
Another Awesome Giveaway!
One of these days I will get better about blogging... I'll try to get something up this weekend. The last couple of weeks have been pretty crazy/hectic for me (yeah... excuses, excuses, I know!), but I do have something pretty awesome to compensate for my lack of attention...
A PrintRunner Postcard Giveaway!
(Here are the details!)
Postcard Size: Postcards 5x7
Quantity: 100
Colors: 4/0 Front Only Printing
Paper: 14 PT. UV Coating on Front,
Rounded Corners: Yes
Proof: None
Ready to Ship In: 4 Business Days
*Giveaway is open to US Residents only, ages 18 years old and above.
PrintRunner is a fantastic online printing company that I am very excited to be able to partner with for this giveaway. If you received one of Emily's birth announcements, you've seen the excellent quality of their postcard printing services!
I am lucky enough to be receiving the same prize for hosting this giveaway. I plan to help my brother and sister-in-law with some "well wish" cards for their upcoming wedding.
How would YOU use 100 postcards? Leave your idea in a comment to enter this giveaway!
Deadline to enter is Friday, June 22nd. The winner will be announced the following day and has 24 hours to get me their e-mail address before I move on to another winner!
**P.S. Don't forget to enter my other giveaway for a print canvas on my photo website! Deadline for that one is TONIGHT!
Wednesday, May 30, 2012
How Not to Soak an Infant (on a budget)
Oregon weather sucks. As many of you have heard, there are only two seasons in Oregon: rain and construction. Unfortunately this year, the rain has WAY out lasted its season... which means, as a new mom, I now have to think about how to keep the little one dry.
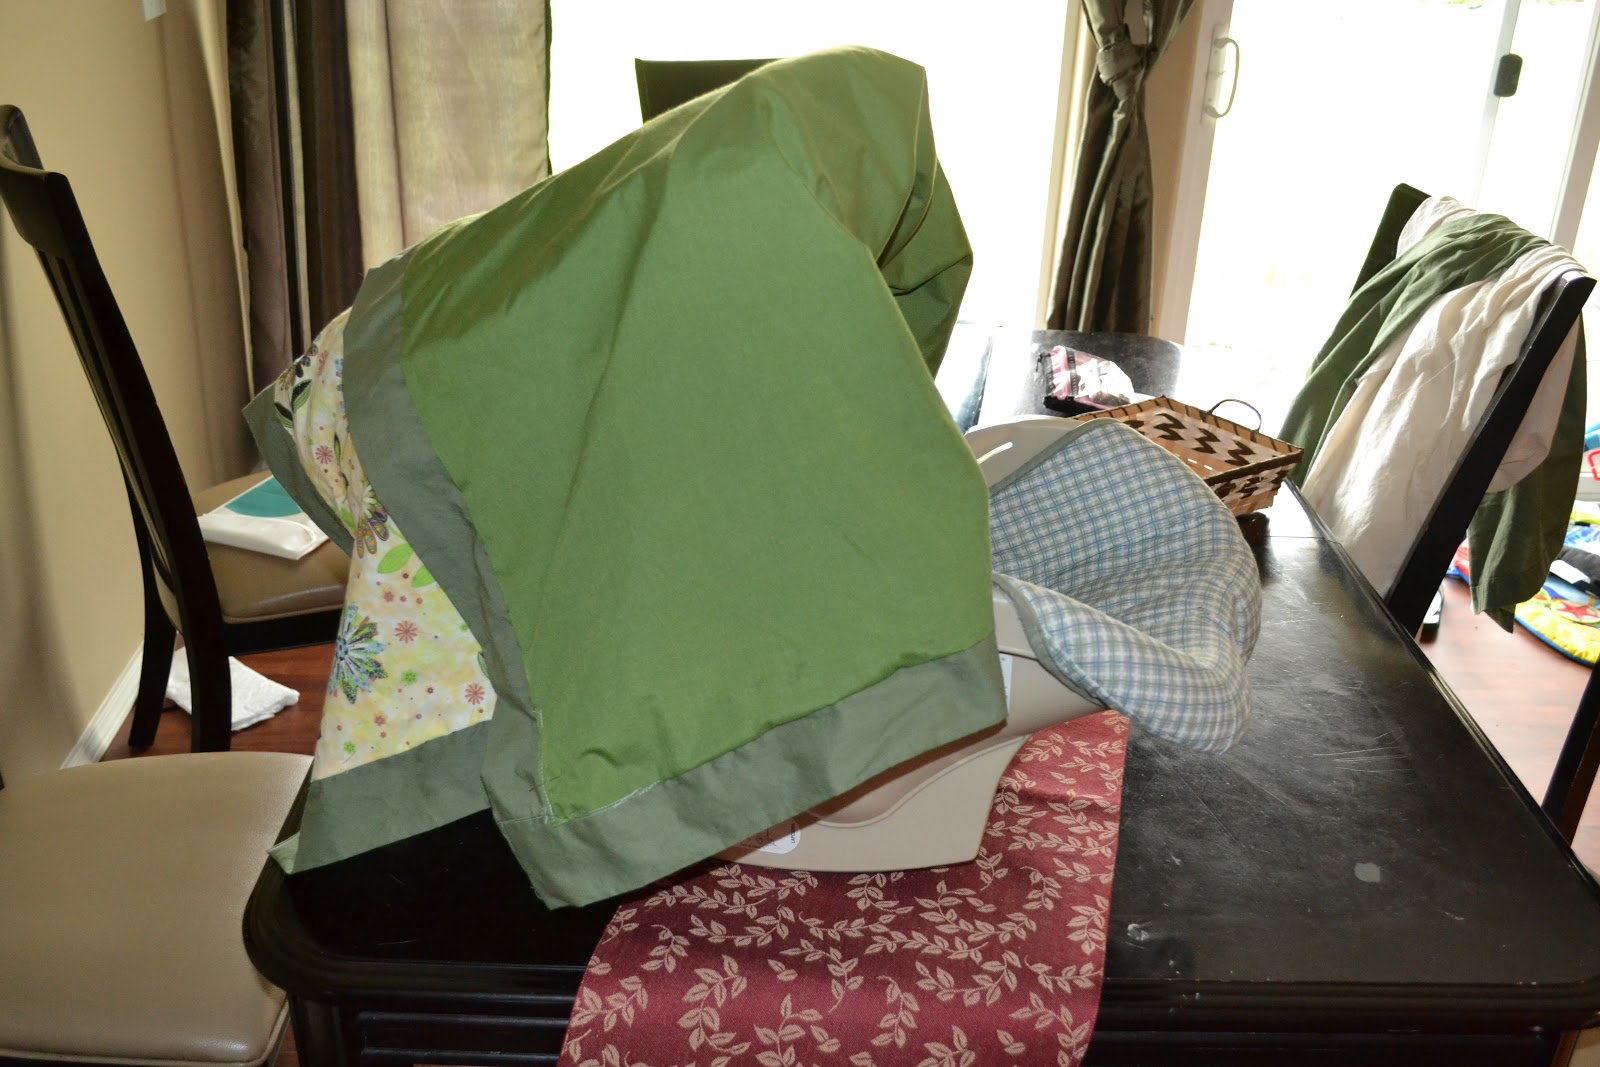
I started shopping around for car seat canopies and, like all other baby-item purchases, balked at the price tag ($30-$50 for a blanket with straps?? Really??) so, I got all "I can so make one of those myself" and set out for the fabric store.
One thing that you should know about me (if you don't already) is that I have some pretty good problem solving skills... but I'm not so keen on following other's directions. I tend to try to come up with my own way/idea and see how it pans out. Which is exactly what I did with the canopy. I knew what I needed to make (a blanket with straps) and knew how big it had to be (enough to cover a car seat).
Did I measure the car seat? No.... which caused all sorts of problems.
I figured that a yard of two pieces of fabric would be big enough (one for the front side and another for the under-side). So, that's what I bought. When I brought it home and actually laid the fabric out over the car seat, I realized that it was probably going to be just a little too short when the seam was actually done. Problem.
Solution? Sew another piece of fabric as a border around the outside, adding a couple more inches. And I just happened to have an old curtain lying around that matched!
Problem? I am NOT a skilled sewer/quilter and my simple solution of "just sewing a border" was a bit more complicated than I anticipated.
But, in the end, I have a final product. It's functional... but just don't inspect it too closely. ;)
Total cost: $13
(Could have made it cheaper had I bought fabric that was on sale/clearance, but I wanted something pretty. lol)
I started shopping around for car seat canopies and, like all other baby-item purchases, balked at the price tag ($30-$50 for a blanket with straps?? Really??) so, I got all "I can so make one of those myself" and set out for the fabric store.
One thing that you should know about me (if you don't already) is that I have some pretty good problem solving skills... but I'm not so keen on following other's directions. I tend to try to come up with my own way/idea and see how it pans out. Which is exactly what I did with the canopy. I knew what I needed to make (a blanket with straps) and knew how big it had to be (enough to cover a car seat).
Did I measure the car seat? No.... which caused all sorts of problems.
I figured that a yard of two pieces of fabric would be big enough (one for the front side and another for the under-side). So, that's what I bought. When I brought it home and actually laid the fabric out over the car seat, I realized that it was probably going to be just a little too short when the seam was actually done. Problem.
Solution? Sew another piece of fabric as a border around the outside, adding a couple more inches. And I just happened to have an old curtain lying around that matched!
Problem? I am NOT a skilled sewer/quilter and my simple solution of "just sewing a border" was a bit more complicated than I anticipated.
But, in the end, I have a final product. It's functional... but just don't inspect it too closely. ;)
Total cost: $13
(Could have made it cheaper had I bought fabric that was on sale/clearance, but I wanted something pretty. lol)
| P.S. I used ribbon for the straps rather than velcro... figured that this would be easier. |
Monday, May 28, 2012
Canvas Print Giveaway!
I'm hosting a giveaway for a free print canvas from U-Printing over on my photo blog.... check it out!
Saturday, May 12, 2012
DIY Baby Wrap
With the weather forecast reaching almost 90 degrees in the Portland metro area tomorrow, we plan to head over to the coast for a day at the beach! I knew that I wanted to get a baby wrap before we went so that we could easily "wear" Emily as we walked around (instead of having to deal with a stroller or something down on the sand).
In the months leading up to Emily's arrival I found a couple of DIY Moby-like baby wrap tutorials: here and here--so, today I set out for the fabric store and purchased 5 yards of jersey knit* and set to work. Easiest "craft" project I've ever done, and we are definitely "beach-ready"!
Here's Jacob and Emily modeling my final product (he is now wearing her as he plays on his computer. lol):
*Fabric is EXPENSIVE these days! I ended up spending just as much on fabric as I would have for the Moby itself at Target.... but, because I got a 60" width, I was able to cut the fabric in half (width wise, for two 30" widths) and have enough fabric for TWO wraps... either to give one as a gift, or have it at the ready for when the first one is (inevitably) in the wash.
In the months leading up to Emily's arrival I found a couple of DIY Moby-like baby wrap tutorials: here and here--so, today I set out for the fabric store and purchased 5 yards of jersey knit* and set to work. Easiest "craft" project I've ever done, and we are definitely "beach-ready"!
Here's Jacob and Emily modeling my final product (he is now wearing her as he plays on his computer. lol):
*Fabric is EXPENSIVE these days! I ended up spending just as much on fabric as I would have for the Moby itself at Target.... but, because I got a 60" width, I was able to cut the fabric in half (width wise, for two 30" widths) and have enough fabric for TWO wraps... either to give one as a gift, or have it at the ready for when the first one is (inevitably) in the wash.
Saturday, March 24, 2012
The Nursery: Revealed!
I have blogged a little bit about some of the work that we have done on the nursery... painting... putting the crib together... getting my wonderful glider. But it has been several weeks since I last posted anything about the progress of the nursery. That's because I was doing my favorite part... decorating! =) And also receiving various items from our friends and family members.
The nursery has been "done" for probably about a month now. By "done" I mean that, if she came really early, we would be able to make due with what we had in place. However, now I feel that the nursery is REALLY done... i.e. it looks cute, too! =)
Here are some photos of our little one's room... just waiting for her to show up!
We really lucked out in terms of furniture and supplies. The crib came from Jacob's brother, who used it for his two kids. The dresser and chest we had already in our "guest room" (both came from Jacob's family as well). The shelves also came from Jacob's folks. The glider and lamp were both Criagslist finds, and the shelving unit came from Target. We bought the crib mattress and changing table pad at Babies R Us, and the shaggy rug at Target. The curtains and cushions are home made. I'm very happy with how it all turned out... and looking forward to seeing what is going to be needing to be changed to make it a bit more "functional" (I'm sure there will be surprises that I haven't even thought about yet! lol).
Just a little over 3 weeks to go! =)
The nursery has been "done" for probably about a month now. By "done" I mean that, if she came really early, we would be able to make due with what we had in place. However, now I feel that the nursery is REALLY done... i.e. it looks cute, too! =)
Here are some photos of our little one's room... just waiting for her to show up!
| Found this decal at Target.... had to make a few adjustments, but I love the idea! |
| For shopping lists and "to-do's" |
| Sitting area... complete with cushions c/o my soon-to-be sister-in-law Jennifer, for some cozy "guest" seating. =) |
| Found this lamp via CL. I wanted something that would give me enough light to see by in the middle of the night, but wouldn't totally freak out my senses! I may still get a dimmer bulb for it. |
We really lucked out in terms of furniture and supplies. The crib came from Jacob's brother, who used it for his two kids. The dresser and chest we had already in our "guest room" (both came from Jacob's family as well). The shelves also came from Jacob's folks. The glider and lamp were both Criagslist finds, and the shelving unit came from Target. We bought the crib mattress and changing table pad at Babies R Us, and the shaggy rug at Target. The curtains and cushions are home made. I'm very happy with how it all turned out... and looking forward to seeing what is going to be needing to be changed to make it a bit more "functional" (I'm sure there will be surprises that I haven't even thought about yet! lol).
Just a little over 3 weeks to go! =)
Monday, March 19, 2012
Old Fashion
You may call me old fashioned, but, I don't trust the Internet. I don't trust that 30 years from now it's still going to "exist" and that everything that I've written on my various blogs will be preserved for myself and future generations to have access to. I much prefer the old school version of written content storage... books! =) So, for the past couple of years I have been using the website Blog2Print to turn a year's worth of blog into a bound book.
I LOVE it! I feel like it's a great value for my money and will be around "forever". I've already gone back through some of the older entries in nostalgia. =)
This morning I got an e-mail letting me know that the website is having a 15% of sale until March 23rd, so I wanted to pass this news along to all of you in case you are interested. Simply put in couple code: simplysave15
I hope someone takes advantage of this. I really have been happy with my experiences with the company!
I LOVE it! I feel like it's a great value for my money and will be around "forever". I've already gone back through some of the older entries in nostalgia. =)
This morning I got an e-mail letting me know that the website is having a 15% of sale until March 23rd, so I wanted to pass this news along to all of you in case you are interested. Simply put in couple code: simplysave15
I hope someone takes advantage of this. I really have been happy with my experiences with the company!
Tuesday, February 21, 2012
Who Wants Free Stuff??
I have recently partnered up with PrintRunner, an online printing company, and they have offered to let me host a giveaway! I LOVE hosting these, especially for postcard printing services online. That's right, this giveaway is for:
I ALWAYS loved these giveaways when I was wedding planning. And now that there's a baby coming, I'm thinking of all of the baby related things that I could do with the postcards that I get for hosting the giveaway (baby shower thank yous? Birth announcements?)
Here's what you get if you win:
Giveaway prize: Postcards
Postcard Size : Postcards 5x7
Quantity : 100
Colors : 4/0 Front Only Printing
Paper : 14 PT. UV Coating on Front,
Rounded Corners: Yes
Proof : None
Ready to Ship In : 4 Business Days
Postcards!!
I ALWAYS loved these giveaways when I was wedding planning. And now that there's a baby coming, I'm thinking of all of the baby related things that I could do with the postcards that I get for hosting the giveaway (baby shower thank yous? Birth announcements?)
Here's what you get if you win:
Giveaway prize: Postcards
Postcard Size : Postcards 5x7
Quantity : 100
Colors : 4/0 Front Only Printing
Paper : 14 PT. UV Coating on Front,
Rounded Corners: Yes
Proof : None
Ready to Ship In : 4 Business Days
*Giveaway is open to US Residents only, ages 18 years old and above.
So, how do you win? Simple. Post a comment on this post telling me that you want it! =)
The winner will be randomly selected (via random.org) and announced on March 6th. If you don't leave me your e-mail address in the entry comment, then you MUST respond to the winner announcement post within 24 hours to claim your prize... or I move on to someone else!
Sunday, January 22, 2012
Cribbage*
*Jacob came up with the name for this post. lol
Our nursery is coming along nicely.... today we put the crib together! The crib was a hand-me-down from Jacob's brother, who has two kids of his own. Once we got all of the pieces to our place (thanks to J's mom) we made a run to the hardware store and set to work!
I was a little worried about the whole construction process.... since it didn't come with any instructions and I didn't know what we were doing. But Jacob had it down... I really need to learn to trust his ability to do some stuff. ;)
Now that we have the crib, we were able to arrange the furniture (which we are pretty much done accumulating) and now I can focus on the fun stuff... decorating!
(P.S. It's REALLY weird having a crib in our house... lol)
Our nursery is coming along nicely.... today we put the crib together! The crib was a hand-me-down from Jacob's brother, who has two kids of his own. Once we got all of the pieces to our place (thanks to J's mom) we made a run to the hardware store and set to work!
| Scout trying to be helpful |
| Taking a break for a little lovin' =) |
| Kitty in a cage |
| Jacob getting some "practice" |
I was a little worried about the whole construction process.... since it didn't come with any instructions and I didn't know what we were doing. But Jacob had it down... I really need to learn to trust his ability to do some stuff. ;)
Now that we have the crib, we were able to arrange the furniture (which we are pretty much done accumulating) and now I can focus on the fun stuff... decorating!
(P.S. It's REALLY weird having a crib in our house... lol)
Sunday, January 1, 2012
Ringing in 2012
I have never had much of a "party-er" type of personality, but this year our low-key New Year's Eve celebration hit an all time low... as far as social activity/celebration goes. We rang in the new year with a game of Scrabble... which I lost. lol We couldn't even watch the ball drop in Time Square because our TV was being cranky and refused to let us get any channel in that televised the events (we are one of the few households in the country, I think, that still don't have cable).
(Dec. 31st also marked our one year anniversary of actually moving into our new home! We've done SOO much in the last year, it's kind of hard to believe!)
While the evening was pretty mellow, our day was productive... we started work on the nursery!
Jacob and I have had the paint color picked out for awhile now, and I purchased the fabric for the curtains several weeks ago. Jacob also go some help moving all of the office furniture out of the room and into our guest room (so now we have a combo office/guest room), but we were waiting for a "free" weekend to start the painting. Friday night I asked Jacob if he thought this weekend would be a good one to paint. Surprisingly, he said sure and even called in his "helpers" (parents and aunt) who had mentioned that they wanted to help out with the project. So, yesterday morning we went to Home Depot, used some of your Christmas gift card balance and bought some paint. Jacob, his parents and his aunt painted the nursery (here's what it looked like before) while I worked on sewing the curtains. By the end of the day, we had our "finished"* product!
I'm really happy with the way the color turned out. It's a little more "sea foam-y" than the green that we were going for, but it looks nice and it goes will with our curtain fabric, so I'm happy. Now I'm just antsy to start getting some baby furniture in there so I can start decorating!
*I say "final" product because the curtains weren't really done until this morning. After doing all of the sewing and ironing last night, we hung the curtains and I saw that there was a big spot on the center panel. I looked like a wet spot, but wasn't wet... maybe a grease/oil spot of some sort? So, I threw the panel in the laundry to try to get the spot out... and it shrunk! I know that I should have washed the fabric before I sewed the curtains, but I gave myself extra length/width as a "just in case" measure... but I didn't know that the muslin would shrink almost 6 inches in length!! I was NOT happy. And, to top it all off, the spot didn't even come out! =P So, this morning I took some pre-washed fabric left over from my Christmas table cloth sewing project and made a replacement panel. It is now hang up over the window and looking fabulous. =)
(Dec. 31st also marked our one year anniversary of actually moving into our new home! We've done SOO much in the last year, it's kind of hard to believe!)
While the evening was pretty mellow, our day was productive... we started work on the nursery!
Jacob and I have had the paint color picked out for awhile now, and I purchased the fabric for the curtains several weeks ago. Jacob also go some help moving all of the office furniture out of the room and into our guest room (so now we have a combo office/guest room), but we were waiting for a "free" weekend to start the painting. Friday night I asked Jacob if he thought this weekend would be a good one to paint. Surprisingly, he said sure and even called in his "helpers" (parents and aunt) who had mentioned that they wanted to help out with the project. So, yesterday morning we went to Home Depot, used some of your Christmas gift card balance and bought some paint. Jacob, his parents and his aunt painted the nursery (here's what it looked like before) while I worked on sewing the curtains. By the end of the day, we had our "finished"* product!
| Prepping |
| And there goes some color! |
| And the paint is up! |
| And now for my curtain creations! |
| Curtain pattern close up |
| Finishing touches (c/o xmas gift exchange!) |
I'm really happy with the way the color turned out. It's a little more "sea foam-y" than the green that we were going for, but it looks nice and it goes will with our curtain fabric, so I'm happy. Now I'm just antsy to start getting some baby furniture in there so I can start decorating!
*I say "final" product because the curtains weren't really done until this morning. After doing all of the sewing and ironing last night, we hung the curtains and I saw that there was a big spot on the center panel. I looked like a wet spot, but wasn't wet... maybe a grease/oil spot of some sort? So, I threw the panel in the laundry to try to get the spot out... and it shrunk! I know that I should have washed the fabric before I sewed the curtains, but I gave myself extra length/width as a "just in case" measure... but I didn't know that the muslin would shrink almost 6 inches in length!! I was NOT happy. And, to top it all off, the spot didn't even come out! =P So, this morning I took some pre-washed fabric left over from my Christmas table cloth sewing project and made a replacement panel. It is now hang up over the window and looking fabulous. =)
Sunday, August 21, 2011
From Blog to Book
When I was younger I kept a journal. I have about four of them that chronicle my middle school years. In high school and college I had WAY too much actual written school work to complete, and didn't take the time to write for pleasure. However, about 3 years ago, when I decided to make the move up to British Columbia for grad school, I discovered the blogging world, and finally found a reason to write again, starting a blog about my experiences as an American girl in Canada. And then I got engaged and started a second blog, and then I got married and started a third! lol
Blogging, for me, has been both a way to chronicle my life (much like my journal was in middle school), as well as a way to collect ideas and gather feedback. Unfortunately, I've never loved the fact that I don't have some tangible once I blog something. It just goes off into cyberspace... who knows what will happen to it, how long it will be able to stick around out there, or if something can magically happen to erase it (I'm not overly trusting of today's technology).
I've heard about people turning their blogs into books, but the one time that I looked into it, it was REALLY expensive. Then, a couple of weeks ago, I stumbled across this post from a fellow post-wedding blogger who used SharedBooks to turn her wedding blog into a keepsake, for much less that I had seen other companies do it for. So, I uploaded both my wedding blog and my Canada blog, and got a quote... both blogs into books for a little over $60 (which included shipping!). I was so happy! I decided to black and white pages in order to save money, and hit the "order" button.
I was told that I'd get the books by Sept. 7th... however, they came on Friday! And I couldn't be happier with how they turned out. I think I'm planning to do one of these every year so that I will have something tangible to hold on to. I'm sure my kids will, one day, appreciated the ability to go back and read about their parent's lives... or just give me a laugh in a few years when I read over what my 20's were like (much like a do from time to time with my middle school writings).
Blogging, for me, has been both a way to chronicle my life (much like my journal was in middle school), as well as a way to collect ideas and gather feedback. Unfortunately, I've never loved the fact that I don't have some tangible once I blog something. It just goes off into cyberspace... who knows what will happen to it, how long it will be able to stick around out there, or if something can magically happen to erase it (I'm not overly trusting of today's technology).
I've heard about people turning their blogs into books, but the one time that I looked into it, it was REALLY expensive. Then, a couple of weeks ago, I stumbled across this post from a fellow post-wedding blogger who used SharedBooks to turn her wedding blog into a keepsake, for much less that I had seen other companies do it for. So, I uploaded both my wedding blog and my Canada blog, and got a quote... both blogs into books for a little over $60 (which included shipping!). I was so happy! I decided to black and white pages in order to save money, and hit the "order" button.
I was told that I'd get the books by Sept. 7th... however, they came on Friday! And I couldn't be happier with how they turned out. I think I'm planning to do one of these every year so that I will have something tangible to hold on to. I'm sure my kids will, one day, appreciated the ability to go back and read about their parent's lives... or just give me a laugh in a few years when I read over what my 20's were like (much like a do from time to time with my middle school writings).
Tuesday, August 2, 2011
Heart of the Home
When I was growing up (and even now) the heart of our home was the kitchen/dining room. It seemed that my mother was always in the kitchen, and, to spend time with her we just take a seat on one of the bar stools at the counter. We also always ate dinner as a family, around the table. On special occasions we would finish with dinner and either sit around talking (for hours) or play a game of some kind (we were big fans of Sequence and Spoons).
When purchasing our house, it was important to me to have a space for a dinner table, not only due to my memories of my family, but also because I enjoy hosting dinner parties, and truly believe that the heart of a home is where laughter and socialization occurs... the dinner table.
We found a great table on Craigslist, but the space around it seemed kind of bland/empty. I wanted some artwork to hang on the wall above the table, but couldn't find anything (at a reasonable price) that I liked. Until, one day, I got an e-mail from ArtsCow.
ArtsCow is an online photo product printing company. If you sign up (free) on their site you get a BUNCH of free stuff, and killer deals. I've made several photo books with them and only paid for the shipping fees. I pretty much love them. =)
Anyway, back to my story... I got an e-mail from ArtsCow letting me know about a promotion that they were doing for three canvas prints. I was immediately interested, however, didn't have any shots that I felt went with the natural/neutral theme in my living/dining room/kitchen space. So, one weekend, not too long ago, Jacob and I went to the International Rose Test Garden here in Portland and went photo happy. From those photos, I uploaded three for prints, placed my order and then purchased stretch bars from a couple of art supply stores. When my print came in the mail, I sent to work mounting the canvas and hanging them on the wall. The mounting was a pain (the print was a little too small for the bars, but totally my fault and could easily be avoided had I thought about things a little bit more before placing the order) but I am ultimately quite happy about the way it turned out.
I still feel like it needs a little something more though, so I'm contemplating buying some vinyl word art such as this. Has anyone used this type of thing before? Does it work well?
When purchasing our house, it was important to me to have a space for a dinner table, not only due to my memories of my family, but also because I enjoy hosting dinner parties, and truly believe that the heart of a home is where laughter and socialization occurs... the dinner table.
We found a great table on Craigslist, but the space around it seemed kind of bland/empty. I wanted some artwork to hang on the wall above the table, but couldn't find anything (at a reasonable price) that I liked. Until, one day, I got an e-mail from ArtsCow.
ArtsCow is an online photo product printing company. If you sign up (free) on their site you get a BUNCH of free stuff, and killer deals. I've made several photo books with them and only paid for the shipping fees. I pretty much love them. =)
Anyway, back to my story... I got an e-mail from ArtsCow letting me know about a promotion that they were doing for three canvas prints. I was immediately interested, however, didn't have any shots that I felt went with the natural/neutral theme in my living/dining room/kitchen space. So, one weekend, not too long ago, Jacob and I went to the International Rose Test Garden here in Portland and went photo happy. From those photos, I uploaded three for prints, placed my order and then purchased stretch bars from a couple of art supply stores. When my print came in the mail, I sent to work mounting the canvas and hanging them on the wall. The mounting was a pain (the print was a little too small for the bars, but totally my fault and could easily be avoided had I thought about things a little bit more before placing the order) but I am ultimately quite happy about the way it turned out.
I still feel like it needs a little something more though, so I'm contemplating buying some vinyl word art such as this. Has anyone used this type of thing before? Does it work well?
Labels:
DIY,
Family,
Food,
Friends,
Home Improvements,
Photography
Friday, July 1, 2011
Attack of the Killer Tomoatoes!
We are headed out for a much needed camping trip/vacation tomorrow... I am soooo excited! But, before we take off, I had to show you all pictures of my garden. I'm so excited that things are actually growing and that I will have fresh veggies to eat very soon (though, have already been cutting lettuce for salads...mmmm!).
I have managed to squish a lot of stuff into my little raised garden bed... I think I'm going to have to double what I have next year! Right now I have sunflowers, corn, beans, onions, cucumbers, carrots, lettuce and...
My single tomato plant is taking over my garden! I've had to pick up pieces of it off the ground several times so far...it just keeps growing! lol Thankfully I really love tomatoes! =)
It's amazing how much it's grown in just a month!
I have managed to squish a lot of stuff into my little raised garden bed... I think I'm going to have to double what I have next year! Right now I have sunflowers, corn, beans, onions, cucumbers, carrots, lettuce and...
Tomatoes!
My single tomato plant is taking over my garden! I've had to pick up pieces of it off the ground several times so far...it just keeps growing! lol Thankfully I really love tomatoes! =)
It's amazing how much it's grown in just a month!
Monday, June 27, 2011
*QUICK* Postcard Giveaway!!
Who wants some free postcards? 'Cause I have 100 of them to give away! =)
Long time readers may remember my love for the online printing company Uprinting and how they contributed so much awesomeness to my DIY wedding planning. Well, it's been awhile, but I have been asked to host another of their fantastic giveaways! Details are below.
To enter, please leave your name and e-mail address (unless I already have it) as a comment to this post telling me what cool thing you'll use them for (baby announcements? Wedding thank yous? Get a jump on this year's Christmas cards? Check out Uprinting for some more postcard designs and ideas). For additional entries, you can blog about it, tweet it, or FB it and leave me a link as a separate comment.
The timeline on this is quick, you have until 7 AM PST on June 30th!
Details
Long time readers may remember my love for the online printing company Uprinting and how they contributed so much awesomeness to my DIY wedding planning. Well, it's been awhile, but I have been asked to host another of their fantastic giveaways! Details are below.
To enter, please leave your name and e-mail address (unless I already have it) as a comment to this post telling me what cool thing you'll use them for (baby announcements? Wedding thank yous? Get a jump on this year's Christmas cards? Check out Uprinting for some more postcard designs and ideas). For additional entries, you can blog about it, tweet it, or FB it and leave me a link as a separate comment.
The timeline on this is quick, you have until 7 AM PST on June 30th!
Details
100 Postcards for One (1) Winner
5" x 7"
14pt Cardstock Gloss
No Folding
Front and Back Printing
2 Business Days Print Turnaround Time
Restriction: Limited to US residents 18 years old and above only. Additionally, if you have won the same giveaway within the last six months, you are not eligible to win it again. Sorry!
** This giveaway is sponsored by UPrinting, an online printing company, no monetary compensation was given and I will receive postcards for hosting. See more information about postcards and available postcard designs on UPrinting.com.
Friday, June 10, 2011
Being Green
I subscribe to several of those "daily deal" websites (you know the ones.. Groupon, Living Social, and now Google Deals (we live in the beta-city, woo!), and I often find a lot of stuff that looks fantastic but that I know I can't afford to spend money on... even at a discounted price-- things like restaurant discounts (I already have a bunch from restaurants.com that I haven't used yet) and wine tastings (I would love them, but Jacob doesn't drink) but, from time to time, Jacob or I find something that is just too good to turn down** (like the massage that Jacob bought for me that I utilized today!), or really is something that, in the long run, will save us money.
The specific one that I have in mind right now is my sandwich bags that I purchased from ReUsies. Sure, sure, if I knew what I was doing and wanted to put the time and energy into it I could have made these myself, but I don't, and I didn't, and I bought them. =)
I bought two 2-packs, one for myself and one for Jacob. We both pack lunches most days for work and I WAS feeling slightly bad about all the plastic bags we were using (but not bad enough to bring them home and wash them like my mom used to). These are great. They are cute and work really well! if you have a juicy sandwich, though, I will warn that it may slightly leak through the lining (i.e. I got a couple of little spots on the exterior fabric when I packed a sandwich with tomatoes), but it's not bad enough to deter me from using them. Plus, I feel a little bit better about myself and my status as an Oregonian. ;)
I have also been stocking up on these deals for our first anniversary in a couple of months. I'm not going to tell you what we're going to do, but I will tell you that thanks to Groupon and Living Social we're going to have a fantastic weekend for about half the cost! More to come in August, I'm sure!
The specific one that I have in mind right now is my sandwich bags that I purchased from ReUsies. Sure, sure, if I knew what I was doing and wanted to put the time and energy into it I could have made these myself, but I don't, and I didn't, and I bought them. =)
I bought two 2-packs, one for myself and one for Jacob. We both pack lunches most days for work and I WAS feeling slightly bad about all the plastic bags we were using (but not bad enough to bring them home and wash them like my mom used to). These are great. They are cute and work really well! if you have a juicy sandwich, though, I will warn that it may slightly leak through the lining (i.e. I got a couple of little spots on the exterior fabric when I packed a sandwich with tomatoes), but it's not bad enough to deter me from using them. Plus, I feel a little bit better about myself and my status as an Oregonian. ;)
I have also been stocking up on these deals for our first anniversary in a couple of months. I'm not going to tell you what we're going to do, but I will tell you that thanks to Groupon and Living Social we're going to have a fantastic weekend for about half the cost! More to come in August, I'm sure!
** Discounted passes to this place? Too good to turn down. ;)
Labels:
Budget,
Celebrations,
DIY,
Food,
Jacob,
Married Life,
New Experiences,
Oregon,
Relaxation,
Sports
Friday, May 6, 2011
Moving on Out...
It's been awhile since I've blogged anything... I have no excuse, so I'm not going to try to make one... I'll just move on and try to do better in the future. =)
Now that the interior of our house is pretty much "done" (or, at least, there are no overly important/desired "to do"s on my list), and the weather is starting to warm up a bit, we have been moving on to the outside of the house and dealing with the yard.
I've never been a bit "yard work" type of person, but, for some reason the mere fact that it is now MY yard has changed that tune a little bit. I am having ideas and planning things out, and even, actually, DOING things! lol
About a month ago I started thinking about the vegetable garden that I wanted to plant. I knew that I wanted a raised bed design. I looked a bit at Home Depot's DIY kits, and realized (or, rather, reaffirmed) that I am NOT a DIY type of person. So, I went to my absolute favorite source for this type of thing... Craigslist! And I was successful! I found a guy who custom made garden boxes AND delivered for only a few dollars more than one of the kits at Home Depot would have cost me. In my mind, it was a bargain! Then, with some help from my brother and in-laws, I dug out the grass and we filled it up with a combo of dirt and horse manure. I still need to get out there and mix it up a bit, but here's the "finished" product:
I planted some starts a couple of weeks back, and have been anxiously waiting for them to sprout do I can go out and do the actual planting, but, for some reason, they just aren't sprouting! I really have no idea why, and am starting to get a bit perturbed as I was hoping to get out there this weekend. I did have a nice little surprise waiting for me when I came home today though:
One little sprout poking it's way through! And, best thing yet, it's one of the sunflowers! =)
If the weather doesn't suck too bad this weekend, I'm still going to try to get out there and do some planting. I have a tomato plant to go in and some carrots and onions that I didn't "start", so, we'll see how it goes.
Another outdoor project that Jacob and I started work on this last weekend was taking down the hideous shrub/bush/vine/thing that lines the back of our yard. You may remember it from earlier photos:
See that monstrosity that lines the back fence? I wanted it GONE. lol I hate it, plus, it would give us about 3-4 more feet of yard if it were gone. So, last weekend Jacob and I went to town trimming the shit out of it! =)
We made a dent (and found that people have, apparently, been throwing trash into it!), but we still have a long way to go... what we really need is someone with a chainsaw and a desire to demolish. =) If you know anyone in the Portland area, let me know! And, while you're at it, I have a front yard FULL of frickin' dandelions that we can't seem to get rid of either... so you can add that to your referral list. *sigh* This is our next big project I'm afraid. I'm tired of having the trashiest front lawn on the block. =(
Now that the interior of our house is pretty much "done" (or, at least, there are no overly important/desired "to do"s on my list), and the weather is starting to warm up a bit, we have been moving on to the outside of the house and dealing with the yard.
I've never been a bit "yard work" type of person, but, for some reason the mere fact that it is now MY yard has changed that tune a little bit. I am having ideas and planning things out, and even, actually, DOING things! lol
About a month ago I started thinking about the vegetable garden that I wanted to plant. I knew that I wanted a raised bed design. I looked a bit at Home Depot's DIY kits, and realized (or, rather, reaffirmed) that I am NOT a DIY type of person. So, I went to my absolute favorite source for this type of thing... Craigslist! And I was successful! I found a guy who custom made garden boxes AND delivered for only a few dollars more than one of the kits at Home Depot would have cost me. In my mind, it was a bargain! Then, with some help from my brother and in-laws, I dug out the grass and we filled it up with a combo of dirt and horse manure. I still need to get out there and mix it up a bit, but here's the "finished" product:
I planted some starts a couple of weeks back, and have been anxiously waiting for them to sprout do I can go out and do the actual planting, but, for some reason, they just aren't sprouting! I really have no idea why, and am starting to get a bit perturbed as I was hoping to get out there this weekend. I did have a nice little surprise waiting for me when I came home today though:
One little sprout poking it's way through! And, best thing yet, it's one of the sunflowers! =)
If the weather doesn't suck too bad this weekend, I'm still going to try to get out there and do some planting. I have a tomato plant to go in and some carrots and onions that I didn't "start", so, we'll see how it goes.
Another outdoor project that Jacob and I started work on this last weekend was taking down the hideous shrub/bush/vine/thing that lines the back of our yard. You may remember it from earlier photos:
See that monstrosity that lines the back fence? I wanted it GONE. lol I hate it, plus, it would give us about 3-4 more feet of yard if it were gone. So, last weekend Jacob and I went to town trimming the shit out of it! =)
We made a dent (and found that people have, apparently, been throwing trash into it!), but we still have a long way to go... what we really need is someone with a chainsaw and a desire to demolish. =) If you know anyone in the Portland area, let me know! And, while you're at it, I have a front yard FULL of frickin' dandelions that we can't seem to get rid of either... so you can add that to your referral list. *sigh* This is our next big project I'm afraid. I'm tired of having the trashiest front lawn on the block. =(
Saturday, March 12, 2011
One Room Done!
Two months in to buying/moving in to our new home, Jacob and I are finally done unpacking, organizing, and decorating ONE ROOM. lol It has been quite the process, especially since the house is bigger than any space we've lived in before, meaning we don't have enough "stuff" to fill the space (a blessing and a curse).
It occurs to me at this point that I don't think I've shared any photos with you of the house. I think I'm going to try to do it room by room and things get done/accomplished, however, here are a few shots of the exterior of the house (it's pretty much "done").
We have plans to put in a garden and a fire pit, extend the back fence, and, some day, put in a hot tub. But, for now the yard is exactly what we want/need it to be.
The house was more than move in ready when we purchased it. It was a flipped property, so the interior was gorgeous and we didn't need to do any work to make it livable... which is exactly what I wanted. I've always wanted to be able to paint and decorate, but I didn't want to HAVE to do it.
The house is three bedrooms, two baths with a "great room" (kitchen, dining and sitting room in one big open space), a laundry room, and a tv/family room. We did bits and pieces here and there, but the first room that I can say that we have "finished" (at least for now of course) is the family room.
The whole house looks like this. White trim, taupe walls, and the wood floor... an awesome blank slate. =) Unfortunately, since we didn't have much in the way of time between getting the keys and moving out of our apartment, we had to move everything in before doing any prep work (i.e. painting).
Jacob and I had a paint color in mind for a "reverse-accent-wall"... we were going to paint three walls of the room, and leave one the taupe color that it already is. A couple weekends after we moved in, we headed to Home Depot, got our supplies, and decided to get moving!
We finished painting one wall... and as I started to paint the second I started to wonder if the rich color that we chose was going to be TOO much for three walls of the room. I mentioned it to Jacob, we looked around a bit, and decided to finish with the two walls, and then "live with it" for awhile and see what we thought.
We were really happy with the way the paint turned out. I LOVED the color and it goes really well with the taupe that was already there. Now we just had to decorate.
After some searching around, I was able to find an awesome deal on a PERFECT area rug at Bed, Bath and Beyond. My grandma was kind enough to make us some curtains for the room (and the three bedrooms, too!). Finally, I pulled out all of our framed photos and updated the photos inside (many of the old ones were "mine" or "Jacobs" and not really "ours"... so I changed that). The photo project took me the good part of a weekend with all the choosing (we have a LOT of photos to choose from!), the printing, the framing and the arranging. But now the rug is down, the photos are up, and I'm ready to pull back the curtain on our first "finished" room!
So, there you go... room number one. =) The others are coming along... we are slowly acquiring furniture to fill the other spaces, and hanging photos/art/etc. I hope to start painting room number 2 (the guest bathroom) next weekend or so.
I've never been a "home improvement" type of person... but I am definitely a nest-er! =)
It occurs to me at this point that I don't think I've shared any photos with you of the house. I think I'm going to try to do it room by room and things get done/accomplished, however, here are a few shots of the exterior of the house (it's pretty much "done").
We have plans to put in a garden and a fire pit, extend the back fence, and, some day, put in a hot tub. But, for now the yard is exactly what we want/need it to be.
The house was more than move in ready when we purchased it. It was a flipped property, so the interior was gorgeous and we didn't need to do any work to make it livable... which is exactly what I wanted. I've always wanted to be able to paint and decorate, but I didn't want to HAVE to do it.
The house is three bedrooms, two baths with a "great room" (kitchen, dining and sitting room in one big open space), a laundry room, and a tv/family room. We did bits and pieces here and there, but the first room that I can say that we have "finished" (at least for now of course) is the family room.
| Before |
| Furniture in... kinda blah |
| Jacob prepping the paint |
| I LOVE color... but I was still a bit nervous with this first stroke! =) |
We finished painting one wall... and as I started to paint the second I started to wonder if the rich color that we chose was going to be TOO much for three walls of the room. I mentioned it to Jacob, we looked around a bit, and decided to finish with the two walls, and then "live with it" for awhile and see what we thought.
| Painting done! |
We were really happy with the way the paint turned out. I LOVED the color and it goes really well with the taupe that was already there. Now we just had to decorate.
After some searching around, I was able to find an awesome deal on a PERFECT area rug at Bed, Bath and Beyond. My grandma was kind enough to make us some curtains for the room (and the three bedrooms, too!). Finally, I pulled out all of our framed photos and updated the photos inside (many of the old ones were "mine" or "Jacobs" and not really "ours"... so I changed that). The photo project took me the good part of a weekend with all the choosing (we have a LOT of photos to choose from!), the printing, the framing and the arranging. But now the rug is down, the photos are up, and I'm ready to pull back the curtain on our first "finished" room!
| Entry way from the front door... see the red wall?? =) |
| One thing I love about the house... TONS of windows! |
| First photo wall (the one you see in the mirror reflection in the first photo above) |
| Ta da! |
| So many awesome memories! |
| The "Wedding Wall" |
I've never been a "home improvement" type of person... but I am definitely a nest-er! =)
Subscribe to:
Posts (Atom)


.jpg)