
I am NOT a "do it yourself" type of person. In fact, I didn't even know what "DIY" stood for until I started planning the wedding. I have never been particularly crafty. I enjoy the visual arts (photography, graphic design, movies, etc.) but it when it comes to actually using my hands to assemble... let's just say that there better be first aid supplies near by!
One thing I soon discovered at the beginning stages of the wedding planning was that there was no way I was going to be able to have everything I wanted on our low budget without doing some of the work myself. So, I set about brainstorming, designing, printing, folding, gluing, tying... and bribing other people to help me. =) On my wedding blog I already revealed our invitations, seating chart, and table number, and touched on our wedding favors, but here's a look at the DIY projects that have not yet been revealed:
The Programs
One of the first posts I "starred" in my google reader was this post about the bride-to-be's accordion programs. I thought they were fantastic, and, after reviewing several other styles of programs, I ultimately decided on these. But I knew I was going to need some help with the detail work, so, I recruited my bridesmaids, mother, grandmother, and brothers' girlfriends, and we had ourselves a "paper party" (also did the invitations and started on the favors... which I'll touch on in a second).
First I designed the interior in Publisher, sent it in to printed on longer paper, and cut, at Staples, ordered paper for the covers, purchased some ribbon, and with the stickers I'd designed/won from Uprinting, I was all set. Here's a look at the final product:


As you can see, I kinda of miscalculated the number of panels I was going to need... and didn't save one to glue the front cover to. *grumble, grumble* Thankfully, I managed to come up with a quick fix but adding an extra fold. I was not particularly happy about this. But, since I didn't discover my mistake until the VERY last minute, I had to do what I had to do. All in all, I was pretty happy with the way these turned out.
The Favors
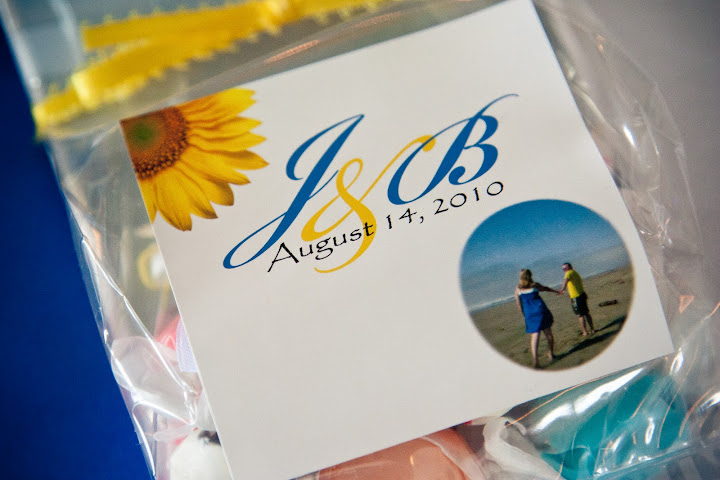
I really didn't know how I came up with the idea for the favors. I just knew that I wanted to have them, but couldn't spend a lot of money on them. I browsed around and realized that I couldn't even really afford to purchase something... thus, back to the DIY board. I also knew that I didn't want stupid little waste-of-space favors that were just going to get thrown away or left on the table. I wanted something that people would actually like/use... so, what better than food? And who doesn't love kitchen magnets? =)
In order to keep the beach theme going, we decided on salt water taffy, and starfish magnets. We bought taffy in bulk at Winco, and managed to find some bulk starfish through the Oriental Trading Company (did you know that they have an entire wedding planning catalog??). With this in hand, as well as borrowed glue guns, button magnets and snack bags from Joann's, our stickers and postcard thank you notes that I won (again) from Uprinting (I love this company), my girls and I set out to assemble the favors (I ended up having to finish over the following weeks... I tied so many damn bows for this wedding I swear my kids are only wearing velcro shoes!).
I don't have many photos of the completed favors, but here is the one that I do have via our photographer:
I also have some shots of the left over starfish magnets that now make their home on our fridge:

 |
| I love this shot with our engagement photo, two wedding photo magnets we got for Christmas, and the "love" poetry magnet. =) |
Guest Book
So the guest book wasn't a huge DIY project, but it was one none-the-less. I wanted something a little more creative than your typical wedding guest book (I wanted to SEE it again and not just shove it in a drawer somewhere). But, I'm also not skilled enough to do some of the other awesome things I've seen done. Also, I wanted guests to be able to write a comment rather than just their names if they wanted to, so a matted photo was kind of out of the question as well since I didn't think there would be enough room. So, here's what I did.
I found this great photo album at Target, purchased some unlined index cards and some colorful pens from Staples, got some photos of Jacob and I printed out and voila! Guest book! I dispersed the photos throughout the book, leaving room on each page for a guest to sign or write a note/well wish on an index card and slide it into the book. Then, after the wedding, I had our favorite guest-shot photos printed out (Jacob and I made a google album for guests to upload their photos), and replaced the photos that I put in the book for the reception with these guest shots. So now we have a true guest book... filled with photos AND comments by our wonderful guests. Take a look:


I had a pretty good time looking through all the guest photos (we had more than 500 uploaded onto our site!). There were some good shots among them, and some shots that our photographer didn't even get the chance to catch.
Thank You Sign
I was determined to have one of these great thank you signs to get photos with and put on our thank you cards.Uprinting.. lol). Then I set out gluing the poster to the matte board. Regular glue wouldn't hold... so I pulled out some super glue. BAD IDEA! I ended up gluing my finger to the matte board! I tried very carefully to remove my finger from the matte, but, alas, I pulled up some of the blue matte. I was soooo NOT happy. There was a bit of a temper tantrum at that point. And definitely some tears and inappropriate language. Then I remembered these shoes that my friend Holly bought for me (and that my cat had since torn the flowers from). I managed to find out of the sunflowers laying around the apartment, and covered the tear with it. Here is the final product set up near our gift table at the reception (c/o our photographer):

Here's the kicker though... after all this, and so much wanting a photo, we TOTALLY FORGOT to get our photographer to take any photos of us with the sign!!! I was soooo annoyed when I remembered the next day. So, in a hope to somewhat remedy the situation, Jacob and I returned to the beach the next day with the sign, set it up in various places along the coastline and took photos of it, planning to use those for our thank yous. F*** Up number 2... week's later when I designed and had the thank you printed, I realized that I completely forgot to include these back up photos at all! LOL So, my HARD work on this damn sign resulted in it only being seen here at the gift table. lol Oh well, life goes on, right?
The Thank Yous
What I DID end up doing for the thank yous was making a photo collage of some of my favorite guest-shot photos, having them printed in post card format with our address printed on the back (with lots of room left for a person note) and then mailing them out. I wanted the cards to stay looking nice (and not get all marked up and bent during delivery) so Jacob and I opted to send them in left over invite envelopes rather than send them as postcards. Here's the final product:

Alright... I think that may be the end of the DIY recaps for me... (except for our wedding albums... but I'll get to that in a different post I think). Some of this was fun, some not so much. Some went exactly has planned... many, many did not. lol But, in the end, I'm happy with the way things turned out and learned a lot in the process (both about crafty stuff, as well as myself and what I can handle. lol).
No comments:
Post a Comment